Saturday, April 25, 2015

Reborn Painting Tutorial - Part VII - Details

This tutorial will cover the finer details: stork bites, capillaries, fingernail beds and another layer of blushing, if needed along with defining the lips.

I am going to use the Lip/Blush/Nail premix paint.  I used one brush full and thinner and mixed to a consistency of lotion.

Here is the paint mixed. Make sure during the painting process you are constantly stirring the paint. 

This is my brush I use for the lips, stork bite and fingernail beds.

I use a sea sponge for the stork bite. Here you can see a very small amount of paint on the tips of the sponge. Dab the sponge on to a paper towel to remove the excess paint. Now you dab the sponge on to the area where you want the stork bite to go. Usually the corner of the eyes and bridge of nose up along the forehead.  Blot with a cosmetic sponge to blend but don't rub. You will loose the stork bite effect if you rub. I also use the above brush to get in the corner lid for the effect. Take you brush and just dip the tip of your bristles in the paint. Blot excess paint onto a paper towel. Take the tip of the brush and blot it in the upper eyelid corners and up to where you want the stork bite to end.

I applied a layer of paint to the lips. I make sure my brush is almost dry and when you paint the lips, you want to start at the top of the lip and paint down in strips. Don't go across. For the bottom lip I start at the top and work in strips down. If you start to see a lip line dab it with a cosmetic wedge lightly to blend the line. You don't want a harsh lip line.

I use this brush for my capillaries. This is a fine liner brush that I have cut all the bristles except for about 4 or 5 hairs left. You want a very thin fine line for capillaries.

Here you can see I have drawn a few on the cheeks. I have done both cheeks and inside the ear.

Here is the stork bite, two layers of paint on the lips and capillaries on the cheeks.

Now to paint the fingernail beds to give them a pinkish hue. Make sure the paintbrush is somewhat dry when painting the nail beds. You don't want build up around the cuticle. Here are the toes.
I also did another layer of blushing to the toes, heel, pads of the feet. This mix just makes the blushing a little darker. 

Toes of the other foot. Another layer was added of blushing the toes, heel and pads of the feet.

Fingernails.  Another layer of blushing was added to the fingertips and the palms.

When you are happy with all the little details and such, it is time to bake. Bake for 7 minutes at 250 degrees F.

Next will be the final shading - Coming close to calling this little guy done...Painting that is :)

Happy Reborning :)


Friday, April 24, 2015

Reborn Painting Tutorial - Part VI - Blushing

Now the fun part of reborning a kit is finally here. Adding color to give a more "Alive" appearance. This is the Blushing Tutorial:


Colors used for blushing. From Left to Right:
Flesh 08, Pyrole Red #2 Q. Crimson and Yellow Ochre.

I used a "tweezed" cosmetic wedge and regular cosmetic wedge.

I use even amounts of all the colors. From Left to Right:
Pyrole Red #2, Flesh 08, Q. Crimson and Yellow Ochre.

Add your odorless thinner to make a consistency to a lotion consistency.

I brush the paint onto the plucked sponge and then dab onto my paper towel.

This is applied to the cheeks, up the temple and down to the chin and under. Lightly applied.

Now I take my other cosmetic sponge and brush some paint on the thinner end.

Paint applied and dabbed onto a paper towel

Apply to top of ears and around the edge and the tip of the nose using the sponge. A small brush could be used as well for blushing. Make sure the brush is almost dry.

Knees are blushed.

Toes, Heels up the outside of the foot and across the pads of the foot are blushed.

Elbows are blushed

Fingertips, tips, palms and the padding along the bottom of fingers

Blush the back of the fingers to the first knuckle. I also do the center back of hand.

Now we are going to take the same paint mix and do the lips. Using a liner brush apply the blushing mix to the lips. Again the brush needs to be somewhat dry.

Here is a second layer added to the lips.

If you have an open mouth kit do the inside as well. 

Second layer of blushing to the knees.

Second Layer to the tops of toes.

Second layer to the toes, heel up the outside of the foot and over the pads under the toes.

Second layers to the cheeks and outer edge of ear.

Two layers of blushing and after being baked.

Two layers and baked

Two layers and baked.

The limbs blushed and baked.

Next tutorial will cover the details that are added for more realism. Stork bites and Capillaries, etc. 

Happy Reborning :)

Friday, April 17, 2015

Reborn Painting Tutorial - Extras - Part I - Shiny Baby Syndrome

You get done painting and put the parts into your oven and bake like you normally do. Timer goes off, parts come out, cool and you see this dreadful shine - Yes has happened many times to me. 

Two causes to this: 
Oven temp is too hot and/or parts were left in a little too long.

This can be fixed and needs to be fixed before any more painting can be done. The limbs, toes and fingers seem to be the problem areas. I never get a shine on the head. But, these pieces need to be tended to or paint will not stick to the shiny areas. You can paint and paint and paint and as soon as you blot...Paint mysteriously disappears. Frustrating.

Here is how you can fix the problem. 

Genesis Heat Set Matte Varnish - Love It!!! :)

I buy it in the Big Jar...Lasts super long. This is the 4 oz. size.

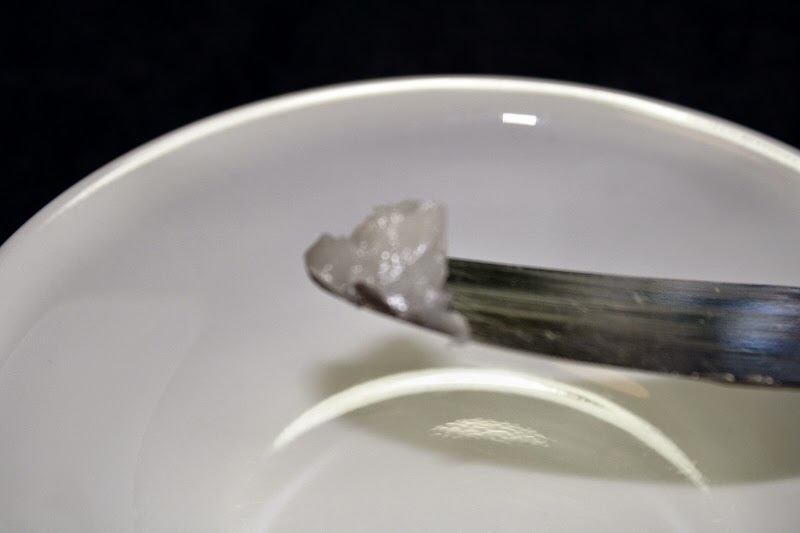
Matte Varnish is very thick. I use an old butter knife to get out of the jar. A small amount is all you need.

I mix the varnish with odorless thinners. I use enough thinner to get a pea soup consistency. I mix and mix until it is totally smooth. No lumps. Some people use it straight out of the jar. Which is fine, but I find it a tad bit harder to blend into creases and such when it isn't thinned. Also Matte Varnish does have a texture to it. Can make the vinyl feel a little rough, especially if you use it straight out of the jar. Another reason why I thin, less of a rough texture feel to the vinyl.

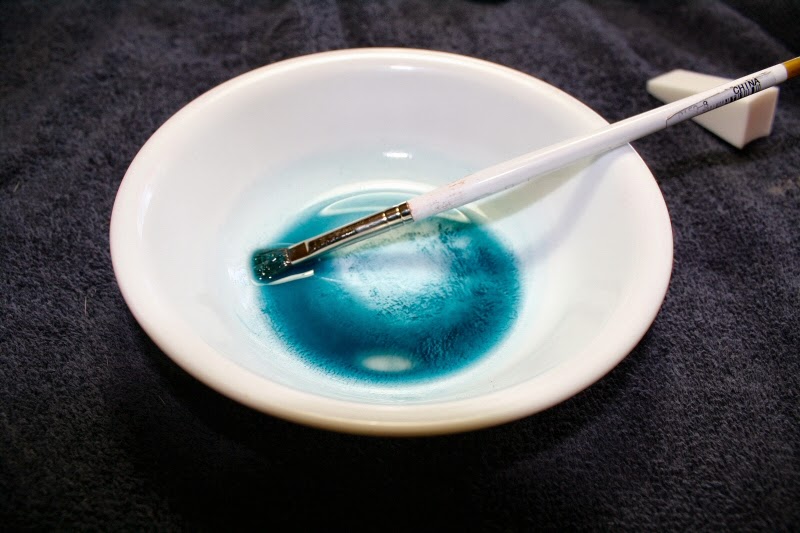
Here it is completely mixed, no lumps. The matte varnish is usually clear, but here it has a tinge of blue. Didn't wash my mixing brush too well. So this is from the blue undertones and veining. Not a problem. As you will see in the following pictures, it did not leave the vinyl with a blue hue.

Mix to a pea soup consistency. 

Here the hand was just shiny. So all I did was just the hand only. Picture is of the varnish already applied, pounced and blended. The hand was this shiny before I applied the varnish. You will need to pounce a lot with your cosmetic wedge and brush. Get into the creases really good. Matte varnish will turn white when dried. Not good to have this powdery white residue in the creases. I pounce until I feel like my arm is gong to fall off. You will be happy you did. If by chance you have a white residue in the creases, take a pointed q-tip dipped in thinner and blend the crease out. 

The foot with matte varnish applied. Again the foot was this shiny before the varnish was applied.
Pounce, Pounce and Pounce until your arm is hurting. lol 

Here are the limbs matte varnish has been applied to the limbs only. I am waiting for the thinner to evaporate and then I am going to bake.

Here are the pieces after they baked. Now here is the trick on baking the heat set matte varnish. You will need to bake twice. Bake 250 degrees F for 7 minutes. Let cool completely. Bake the pieces again at 250 degrees F for 7 minutes. Let cool completely and check to see if the varnish has set. To tell it has cured or set, look over your pieces and if you see any white residue that is an indication the varnish is not set. Take your pointed q-tip dipped in thinner and wipe the creases or where ever the white is, blend with the cosmetic wedge. Let the thinner evaporate and bake again at 250 degrees F for 7 minutes. By this time the varnish should be set. :)

Few tips to keep your babies from shining: Check your temp and watch your time. 

Happy Reborning!! :)

Reborn Painting Tutorial - Part V - Blue Undertones and Veining

This tutorial will show you how to apply the blue undertones and veining. 

I will be using a premix Genesis Heat Set Paint Vein Blue.

Odorless thinner, dropper, GHSP Vein Blue, Cosmetic Wedge
Bowl and mixing brush. Also a pouncing brush to get into creases.

Vein Blue. Some people do this step first before any flesh layers. I used to until I noticed that as you applied your layers you blue undertone kept disappearing, until none were visible. So I do this layer in the middle and will probably add a few more layers towards the end of the painting process.

Very small amount of paint. A little of this color goes a long way.

Spread out before adding any thinner.

Lots and lots of thinner. You want this mix very thin. Thinner than the previous washes that we have done.
This Vein Blue is potent.

I placed arrows at the areas that should be done with the blue, make sure to use your cosmetic wedge to pounce the areas where you applied the paint. Starting at the top. On both sides above the eyebrow and down to the temple area. Across the bridge of nose. Since this is a very thin paint it will run. Make sure to use your brush and cosmetic wedge to get into the creases. You don't want blue paint pooling in those creases. From the corner of the nose down to the top lip area on each side. Finally, the chin crease area, again blend that crease out.  There has been no blue added yet.

Center of the palms down to the wrist. Again, blend those creases and area where the blue was applied.

Center, Middle of foot down to the inside to the ankle. Blend.

Blue undertones added to areas that were marked with arrows. You can see a slight bluing effect. Very subtle, which is what you want. I have applied 3 layers of blue undertones and baked after the third layer. The blushing will bring out the blue a little more. 

Center palms to the inside of the wrist. Three layers have been added and baked. This area tends to need more layers. I usually do that after the blushing, just in case the blushing brings out the subtle hue.

Bottom of feet up to the ankle. Just on the inside. Again very subtle but blushing will pull it all together.

Now for the Veining. Pictures have been manipulated to bring out the veining. You don't want your veins this dark. Again subtle veining is what you are after. This is for this tutorial only.

For the veining, I use the same vein blue paint mix and my liner brush. You want to make sure your brush is somewhat dry of the paint mix before applying your veins. If the brush is too wet from mostly the thinner. Veins will not have a prominent line. If they are too light, go over them again. Make sure you blot with the cosmetic wedge after you have applied the vein and happy with it. At any time you are not happy with how your vein turned out, take your cosmetic wedge and rub the area until the paint is gone. That is one good thing about Genesis Heat Set Paints. They are not set until you heat them. So fixing mistakes are super easy as long as you don't bake. Never bake until you are happy!

Veins on the back of the hands. You may have to click on the picture for a bigger size to see.

On the inside of the arm

Top of foot.

Side of leg.
If in doubt of where to place veins, look at your own veining and placement.

Now off to bake. 250 degrees F for 7 minutes. 

Next will be blushing.
As always, Questions and comments welcomed.

Happy Reborning! :)

Announcement

Trying to reawaken this blog. So busy - But thought I would post that I am happy to announce I have all of my video classes up and ready for...